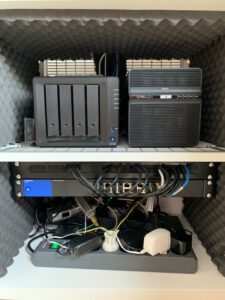
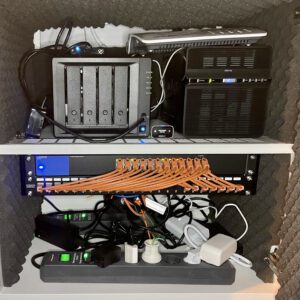
Last year, I wrote an article about a DIY Network cabinet for my flat. This should be a central hub for all network connections and a nice clean space for all network devices such as routers, switches and NAS. This perfectly worked out while living in our flat but needed some adjustments when we moved into our house in late 2020.

As you may remember, one central part of the cabinet was a 24-port gigabit switch. To get the cables to the switch I used a cable throughput and a switching board (which basically are double CAT5 connectors) on the back. So, I had a lot of connectors on the back of the cabinet and only patch cables inside. This was due to the fact that I only had just a few cables coming from the outside. Mainly: One to the printer, one to my desk and one downstairs to the rest of my devices.
This has changed in the house! I wired the house with CAT5 cables, ending up with around 15 CAT5 cables all routing to the switch. So, I mounted the cable throughput I previously had above the switch on the back, where the switching board was. Then, I added a patch panel below the switch. After adding keystones to all cables, and using couplings for the internal devices, I managed to get all devices connected to the patch panel and from there with patch panel to the switch.

The patch cables I used were 15 and 25 cm long – just in case someone has the same issue and tries finding the right length cables. By this I can scale the network cabinet, which is now located in the basement, to serve my whole house. For this, also the FritzBox router now moved inside the cabinet as it does not provide WiFi to the rest of the house anymore. For this I now use multiple Ubiquiti WiFi access points and a Ubiquiti controller located throughout the hose.
Have you built something similar, have questions or comments, share them in the comments below.


